Apache Directory Studio(支持windows/macos/linux)
|
1 2 |
下载地址:https://directory.apache.org/studio/downloads.html 文档地址:https://directory.apache.org/studio/users-guide.html |
1、创建组织
创建用于存放组的organizationalUnit
|
1 |
Object Classes:organizationalUnit |
|
1 2 |
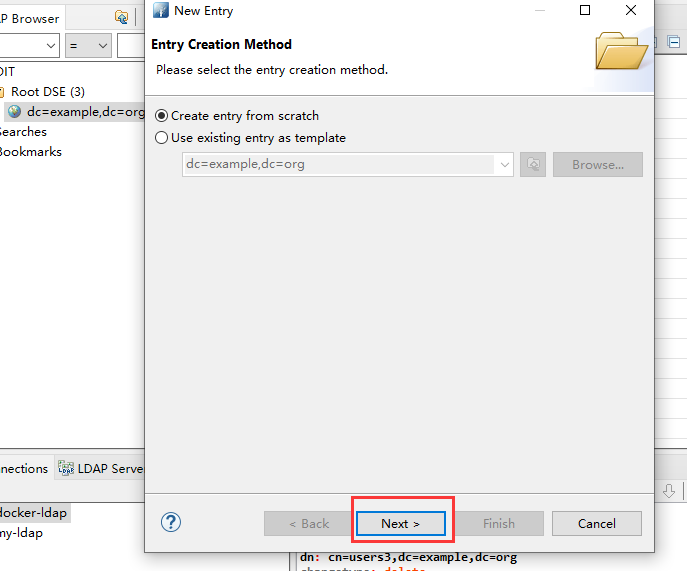
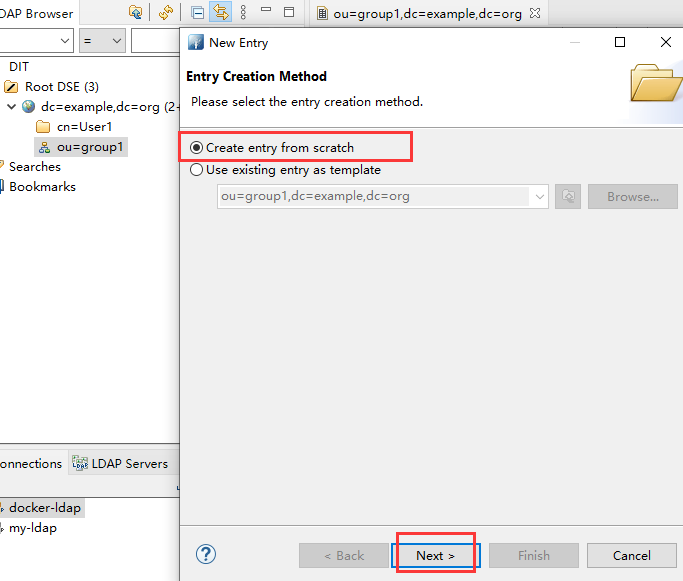
1.右键点击"dc=example, dc=org", 依次选择"New" -> "New Entry" 2.在"Entry Creation Method" 页面选择默认的"Create entry from scratch" ,点击"next>" |
|
1 |
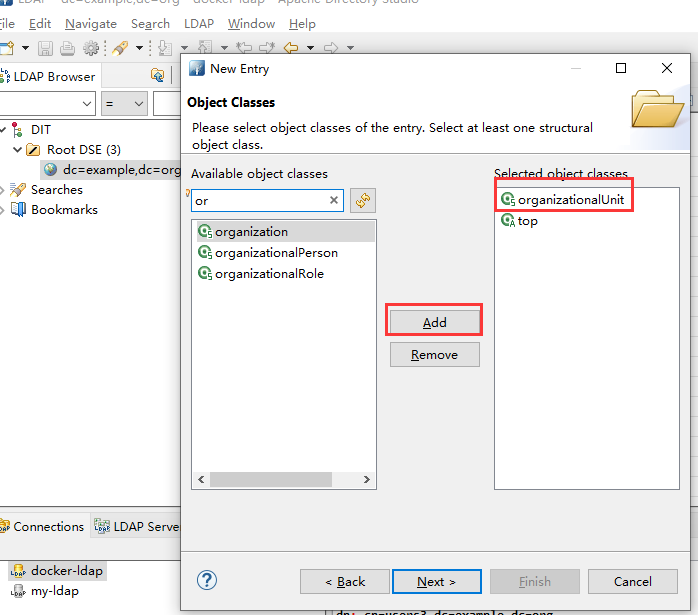
3.在"Object Classes"页面的左侧搜索"organizationalUnit" 后点击"Add" 后如下所示,点击"next>" |
|
1 2 |
4.在"Distinguished Name"页面自定义一个RDN 注意:建议为: ou = 自定义名称,点击"next>" -> "Finish" |
创建用于存放用户的organizationalRole
|
1 |
Object Classes:organizationalRole |
|
1 |
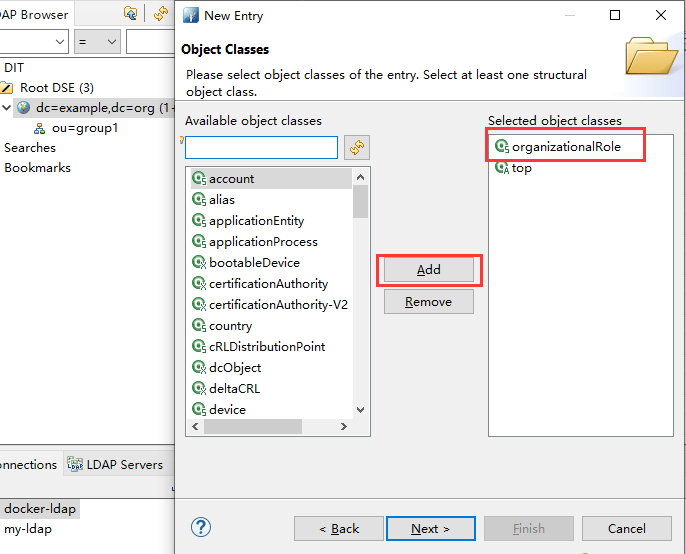
1.在"Object Classes"页面的左侧搜索"organizationalRole" 后点击"Add" |
|
1 2 3 4 |
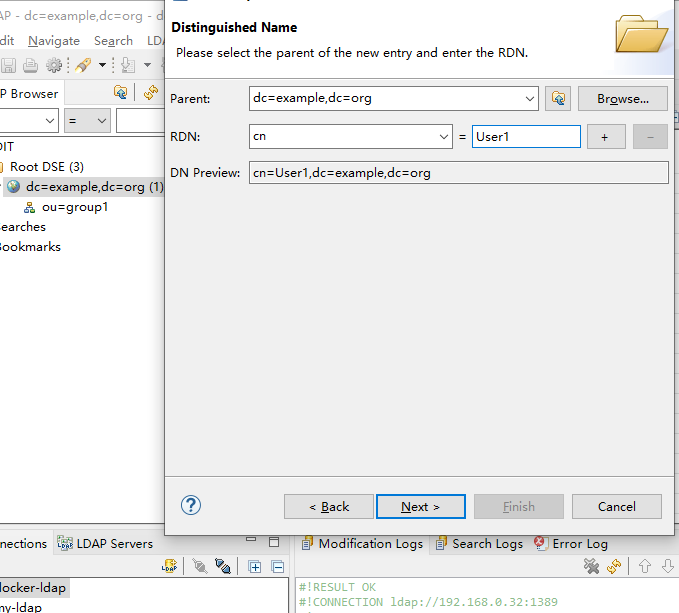
2.在"Distinguished Name"页面自定义一个RDN 建议 cn = 自定义 若填写ou = 自定义,后续还需要补充cn属性 |
|
1 |
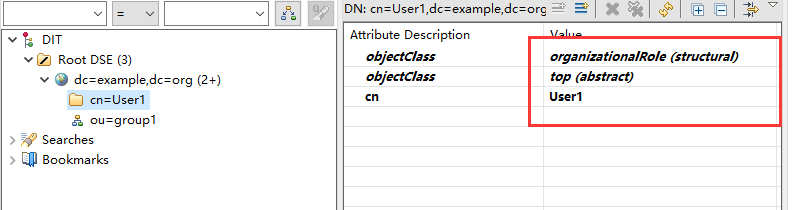
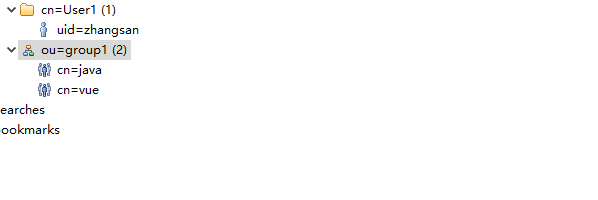
其余步骤参考:创建用于存放组的organizationalUnit,创建成功的结果如下图所示: |
2、创建用户组
|
1 2 |
1.在组的组织单元下,创建组 2.在 ou=group1 右键点击-> New -> New Entry |
|
1 2 3 4 |
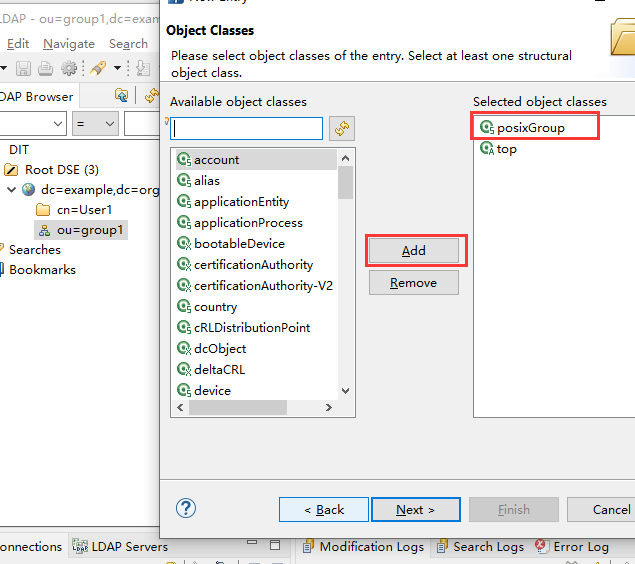
#Object Classes 页面选择 "posixGroup" 3.在"Object Classes"页面的左侧搜索"posixGroup" 后点击"Add" #gidNumber 50000以上(根据 ldapadmin 默认值设置) |
|
1 |
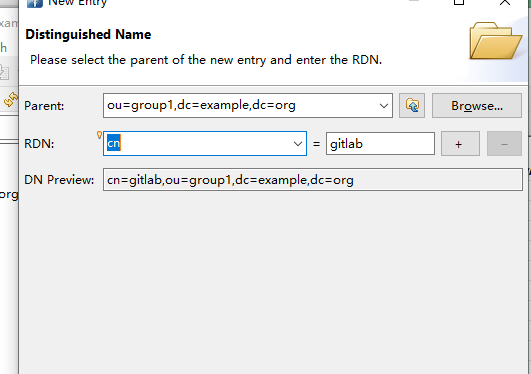
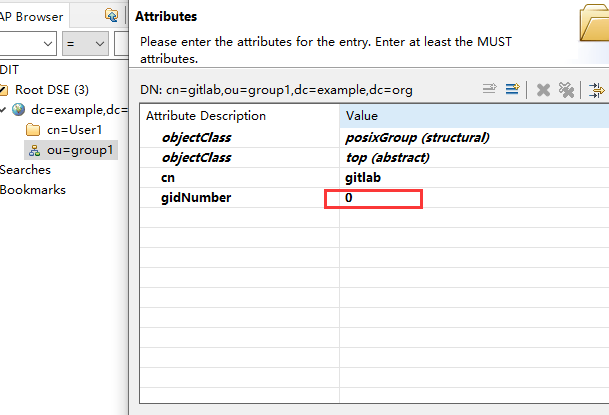
4.在"Distinguished Name"页面自定义一个RDN |
|
1 |
5.设置 gidNumber 为 0 |
3、创建用户
|
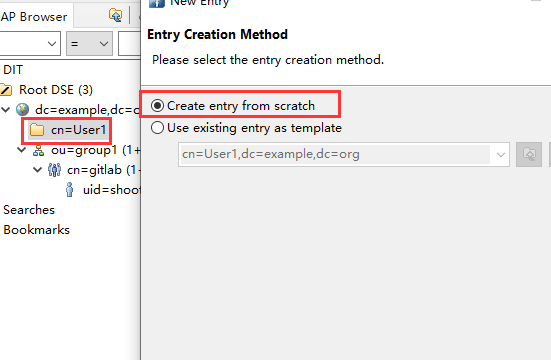
1 2 |
1.在组的组织单元下的对应组中右键创建 2.在 cn=User1 右键点击-> New -> New Entry |
添加对象类
|
1 2 3 |
objectClass: posixAccount objectClass: inetOrgPerson ojbectClass: shadowAccount |

|
1 |
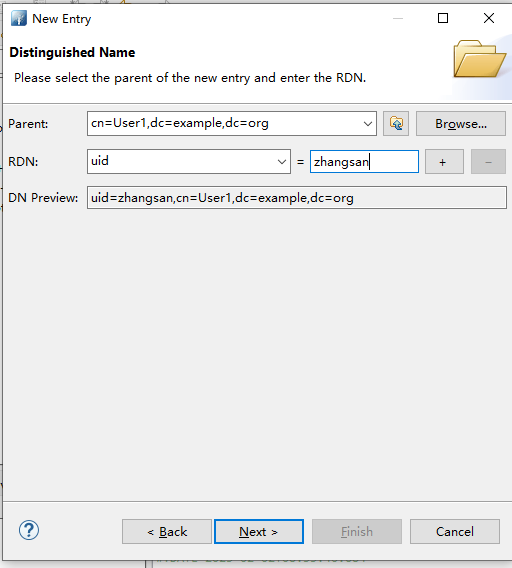
3.在"Distinguished Name"页面配置RDN |
|
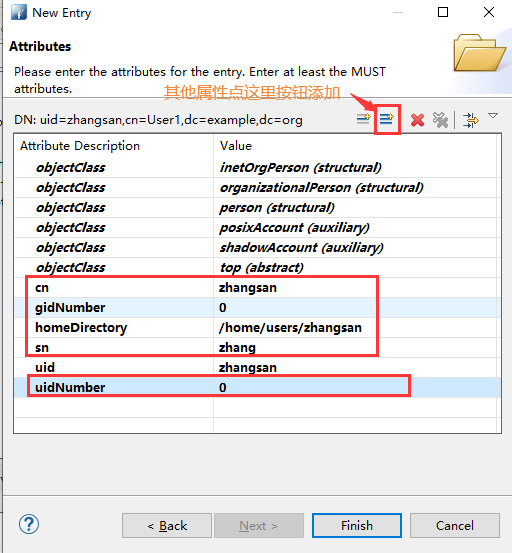
1 2 3 4 5 6 7 |
4.配置其他属性值 注意:一般填写CN属性即可 cn(common name):一般与uid相同 zhangsan gidNumber: 0 #点击可自动补齐 homeDirectory: /home/users/[uid相同] uidnumber: 0 #点击可自动补齐 |
|
1 2 3 4 |
#也可页面添加用户的其他属性(自行摸索) sn:姓 mail:xxxx@mail.com userPassword: 123456 #登录密码(推荐) |
4、gitlab登录验证(未完待续)
|
1 2 3 4 5 6 7 8 9 10 11 12 13 14 15 16 |
1.host,是搭建的openldap的ip,根据实际情况修改; 2.uid,可以配置cn,也可以配置uid,都能识别(具体为什么没深入研究); 3.bind_dn,openldap的管理员账号,根据实际情况修改; 4.password,openldap的管理员密码,根据实际情况修改; 5.active_directory,似乎是针对连接是否是ad域控的标示,因为这部分是openldap的配置,故为false; 6.allow_username_or_email_login,用户登录是否用户名和邮箱都可以,方便用户故配置true; 7.base,用户列表所在的目录,也可以是组,不同组或目录的DN不同,根据自己需求配置。 8.group_base 同步组到gitlab群组中,java项目组,vue项目组等等。例如,group_base 可以是 ou=group1,dc=example,dc=com。在配置文件中,示例如下。 https://docs.gitlab.cn/jh/administration/auth/ldap/ldap_synchronization.html#%E6%B7%BB%E5%8A%A0%E7%BE%A4%E7%BB%84%E9%93%BE%E6%8E%A5 https://www.jianshu.com/p/c5fdaf9446ac |
gitlab官方文档字段解析,点这里
|
1 2 3 4 5 6 7 8 9 10 11 12 13 14 15 16 17 18 19 20 21 22 23 24 25 26 27 28 29 30 31 32 33 34 |
gitlab_rails['ldap_servers'] = YAML.load <<-'EOS' main: # 'main' is the GitLab 'provider ID' of this LDAP server label: 'LDAP' host: '192.168.0.32' port: 1389 uid: 'uid' bind_dn: 'cn=admin,dc=example,dc=org' password: '123456' encryption: 'plain' # "start_tls" or "simple_tls" or "plain" verify_certificates: true active_directory: false allow_username_or_email_login: true block_auto_created_users: false base: 'cn=User1,dc=example,dc=org' user_filter: '' attributes: username: ['cn'] email: ['mail'] name: 'description' first_name: 'givenName' last_name: 'sn' lowercase_usernames: false #group_base: 'ou=group1,dc=example,dc=org' EOS 增加 gitlab_rails['ldap_group_sync_worker_cron']两项:如下 gitlab_rails['ldap_enabled'] = true gitlab_rails['ldap_group_sync_worker_cron'] = "*/2 * * * *" # 修改群组同步时间为2分钟 #如果配置了group_base: 那么就可以同步ldap中的组到gitlab中的群组中,如:java,web,等等。 同步组:https://www.jianshu.com/p/c5fdaf9446ac 社区版好像没这个功能 |
4.1 重新加载新配置
|
1 |
gitlab-ctl reconfigure |
运行后最后一行为“gitlab Reconfigured!”才说明是加载新配置成功,否则就是根据报错信息找错误
4.2 查看是否能正常获取用户列表
|
1 |
gitlab-rake gitlab:ldap:check |
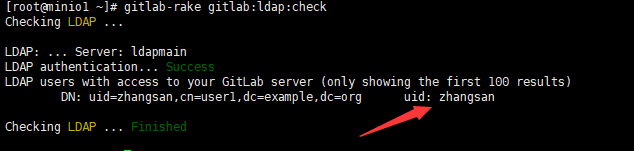
正常连接的情况下执行之后能看到用户的列表
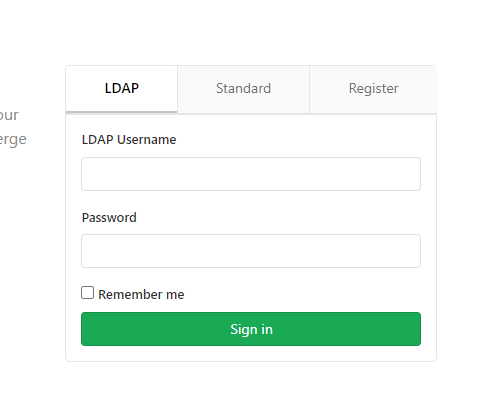
4.3 重启gitlab
|
1 |
gitlab-ctl restart |
重启成功后,gitlab的界面就会变成下面这样。
- 本文固定链接: https://www.yoyoask.com/?p=9940
- 转载请注明: shooter 于 SHOOTER 发表
这个作者貌似有点懒,什么都没有留下。