1.环境准备
|
1 2 |
192.168.66.231 192.168.66.179 |
|
1 2 |
hostnamectl set-hostname freeipa.bigdata-heboan.com #231 hostnamectl set-hostname client01.bigdata-heboan.com #179 |
2.关防火墙和selinux
|
1 2 |
systemctl stop firewalld.service systemctl disable firewalld.service |
|
1 2 |
swapoff -a && sed -i '/ swap / s/^\(.*\)$/#\1/g' /etc/fstab setenforce 0 && sed -i 's/^SELINUX=.*/SELINUX=disabled/' /etc/selinux/config |
3.安装配置(服务端)ipa-server (freeipa.bigdata-heboan.com )
|
1 2 |
yum install ipa-server bind bind-dyndb-ldap ipa-server-dns |
4.配置ipa-server(服务端)
|
1 |
ipa-server-install --setup-dns |
|
1 2 3 4 5 6 7 8 9 10 11 12 13 14 15 16 17 18 |
Server host name [server.test.co]: ---回车键(默认) Please confirm the domain name [test.co]: ---回车键(默认) Please provide a realm name [TEST.CO]: ---回车键(默认) Directory Manager password: ---设置目录管理的密码 最少是8位 IPA admin password: ---设置ipa 管理员admin的密码 最少8位 一定要记住,后面要用到 Do you want to configure DNS forwarders? [yes]: no ---你想配置dns为转发器吗? 选择no Do you want to search for missing reverse zones? [yes]: yes --你想配置dns的反向域吗?选择yes Do you want to create reverse zone for IP 192.168.0.231 [yes]: yes Please specify the reverse zone name [0.168.192.in-addr.arpa.]: [回车] Continue to configure the system with these values? [no]: yes --继续配置系统其他的值? 选择yes |
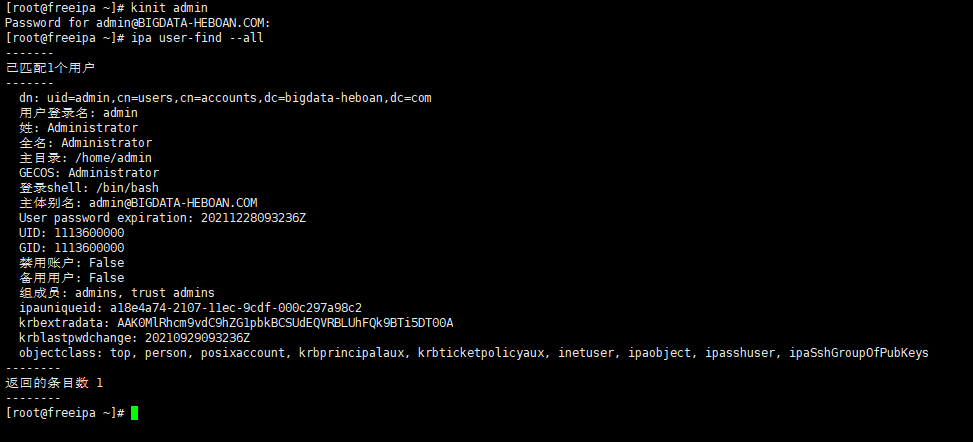
5.验证ipa-server
|
1 2 |
kinit admin Password for admin@BIGDATA-HEBOAN.COM: |
5.1查看所有服务是否都已运行
|
1 |
ipa user-find --all |
5.2 映射访问
|
1 |
https://freeipa.bigdata-heboan.com/ipa/ui |
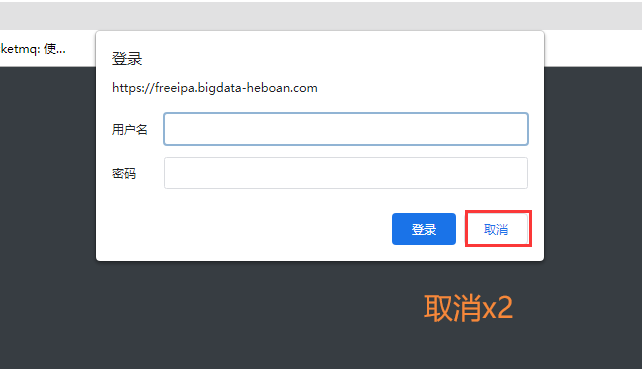
登录成功
6.部署客户端(client01.bigdata-hebona.com)
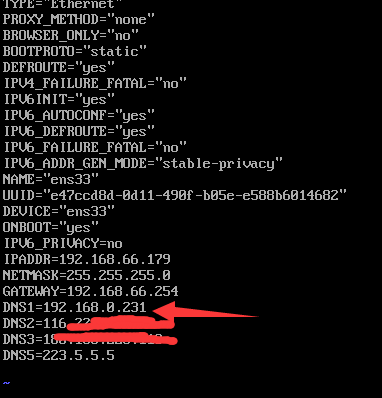
6.1修改客户端的DNS(网卡的配置),然后重启网络 (必须)
|
1 2 |
DNS1=192.168.66.232 #指向freeipa server DNS2=114.114.114.114 |
|
1 |
service network restart |
6.2安装ipa-client
|
1 |
yum install -y ipa-client |
6.3.配置 client加入域
|
1 2 3 4 5 6 7 8 9 10 11 12 13 14 |
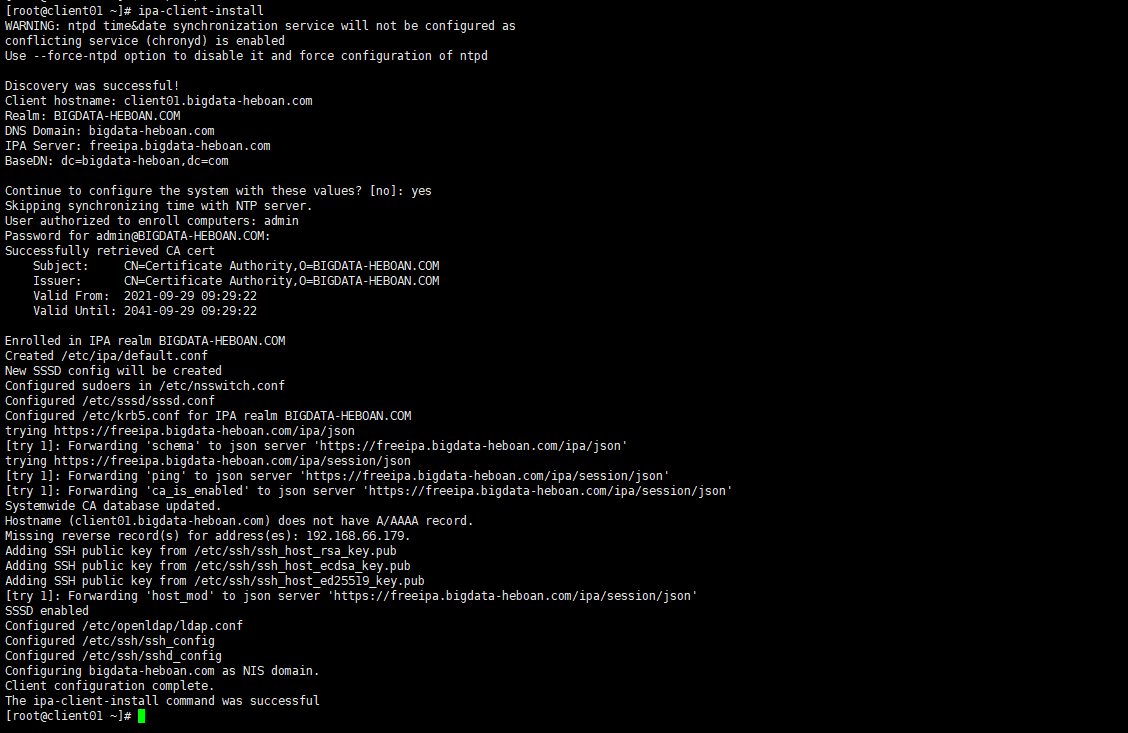
[root@client01 ~]# ipa-client-install WARNING: ntpd time&date synchronization service will not be configured as conflicting service (chronyd) is enabled Use --force-ntpd option to disable it and force configuration of ntpd DNS discovery failed to determine your DNS domain Provide the domain name of your IPA server (ex: example.com): bigdata-heboan.com Provide your IPA server name (ex: ipa.example.com): freeipa.bigdata-heboan.com 然后根据提示输入对应设置 Continue to configure the system with these values? [no]: yes ---继续配置系统其他的值? 选择yes User authorized to enroll computers: admin ---域管理员 Password for admin@BIGDATA-HEBOAN.COM: ---密码 |
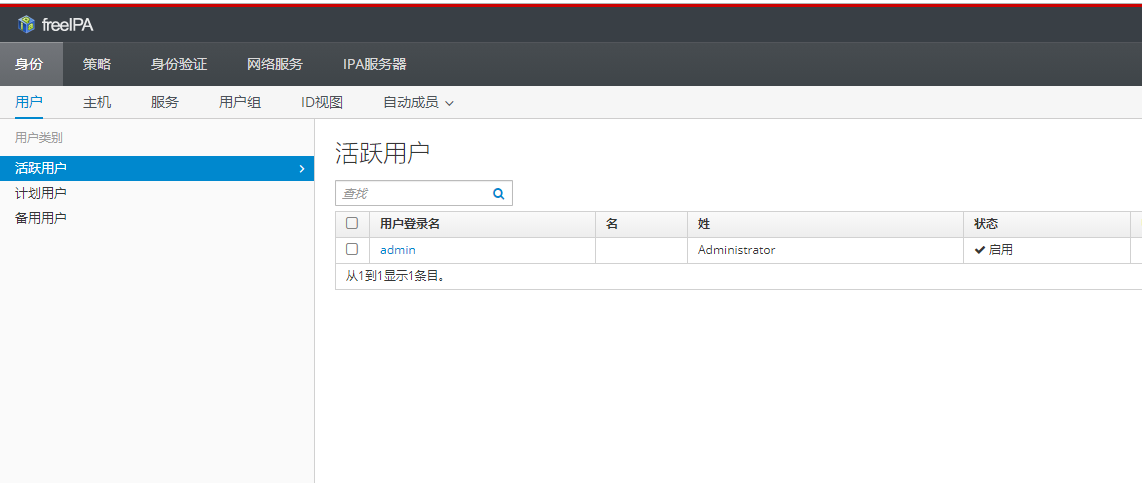
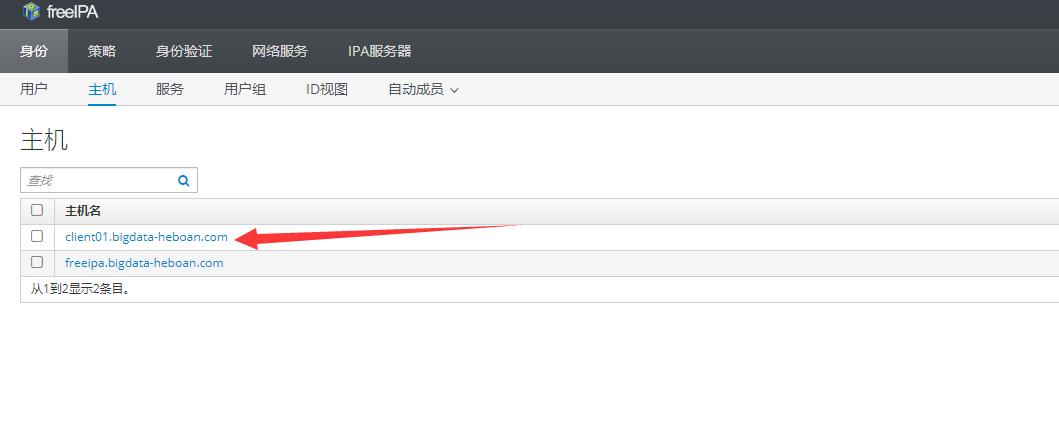
6.4 在web ui上可以看到客户端已经加进来了
7.基本使用
|
1 |
https://my.oschina.net/u/4381995/blog/3486779 |
首次登录要重新输入新密码

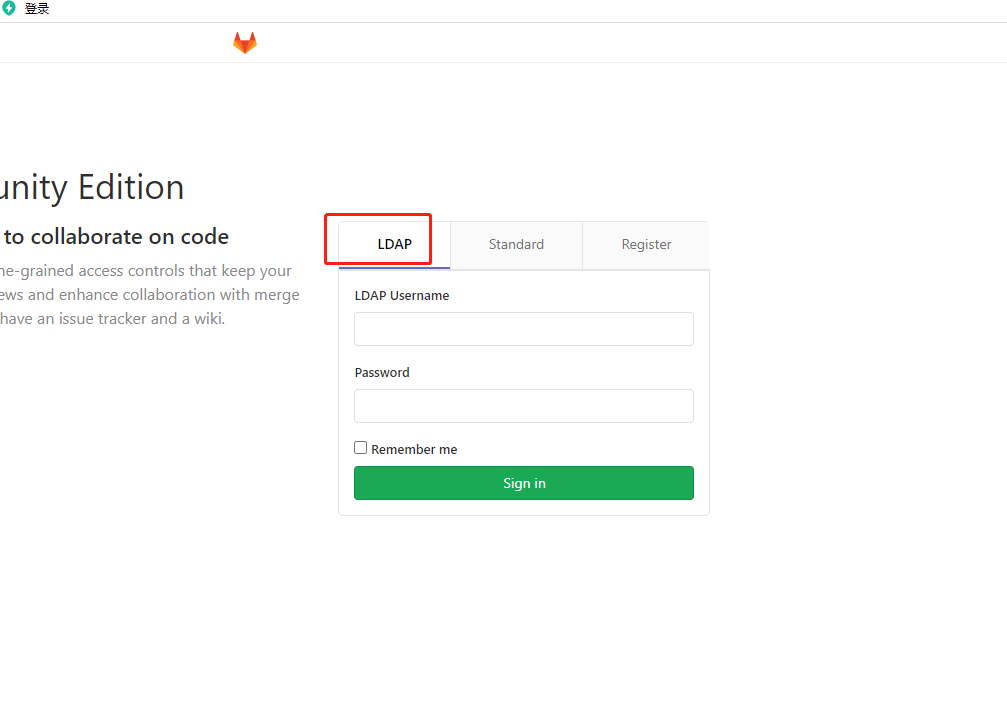
8. gitlab 配置使用ldap
在vim /etc/gitlab/gitlab.rd中添加:
|
1 2 3 4 5 6 7 8 9 10 11 12 13 14 15 16 17 18 19 20 21 22 23 24 25 26 27 28 29 30 31 |
gitlab_rails['ldap_enabled'] = true ###! **remember to close this block with 'EOS' below** gitlab_rails['ldap_servers'] = YAML.load <<-'EOS' main: # 'main' is the GitLab 'provider ID' of this LDAP server label: 'LDAP' host: 'freeipa.bigdata-heboan.com' port: 389 uid: 'uid' bind_dn: 'uid=admin,cn=users,cn=accounts,dc=bigdata-heboan,dc=com' password: '123456' encryption: 'plain' # "start_tls" or "simple_tls" or "plain" verify_certificates: true active_directory: true allow_username_or_email_login: true block_auto_created_users: false base: 'cn=users,cn=accounts,dc=bigdata-heboan,dc=com' #user_filter: 'gidNumber=1113600006' user_filter: '' attributes: username: ['cn'] email: ['mail'] name: 'description' first_name: 'givenName' last_name: 'sn' ## EE only lowercase_usernames: false group_base: 'ou=groups,dc=bigdata-heboan,dc=com' # admin_group: '' # sync_ssh_keys: false EOS |
第二种写法
|
1 2 3 4 5 6 7 8 9 10 11 12 13 14 15 16 17 18 19 20 21 22 23 24 25 26 27 28 29 30 31 32 33 34 35 36 37 38 39 40 41 |
gitlab_rails['ldap_enabled'] = true gitlab_rails['prevent_ldap_sign_in'] = false gitlab_rails['ldap_servers'] = { 'main' => { 'label' => 'LDAP', 'host' => 'freeipa.bigdata-heboan.com', 'port' => 389, 'uid' => 'uid', 'encryption' => 'plain', 'verify_certificates' => true, 'bind_dn' => 'uid=admin,cn=users,cn=accounts,dc=bigdata-heboan,dc=com', 'password' => '123456', 'verify_certificates' => true, 'tls_options' => { 'ca_file' => '', 'ssl_version' => '', 'ciphers' => '', 'cert' => '', 'key' => '' }, 'timeout' => 10, 'active_directory' => true, 'allow_username_or_email_login' => true, 'block_auto_created_users' => false, 'base' => 'dc=bigdata-heboan,dc=com', 'user_filter' => '', 'attributes' => { 'username' => ['cn'], 'email' => ['mail'], 'name' => 'description', 'first_name' => 'givenName', 'last_name' => 'sn' }, 'lowercase_usernames' => false, 'group_base' => '', 'admin_group' => '', 'external_groups' => [], 'sync_ssh_keys' => false } } |
|
1 2 3 |
#加载配置并且重启gitlab gitlab-ctl reconfigure gitlab-ctl restart |
验证是否配置成功
|
1 2 |
gitlab-rake gitlab:ldap:check 正常连接的情况下执行之后能看到用户的列表(正常之下 没有红色提醒) |

成功

然后查看gitlab登录入口
|
1 2 3 4 5 6 7 8 9 10 11 12 13 14 15 16 17 18 19 20 21 22 23 24 25 26 27 28 29 30 31 32 33 34 35 36 37 38 39 40 |
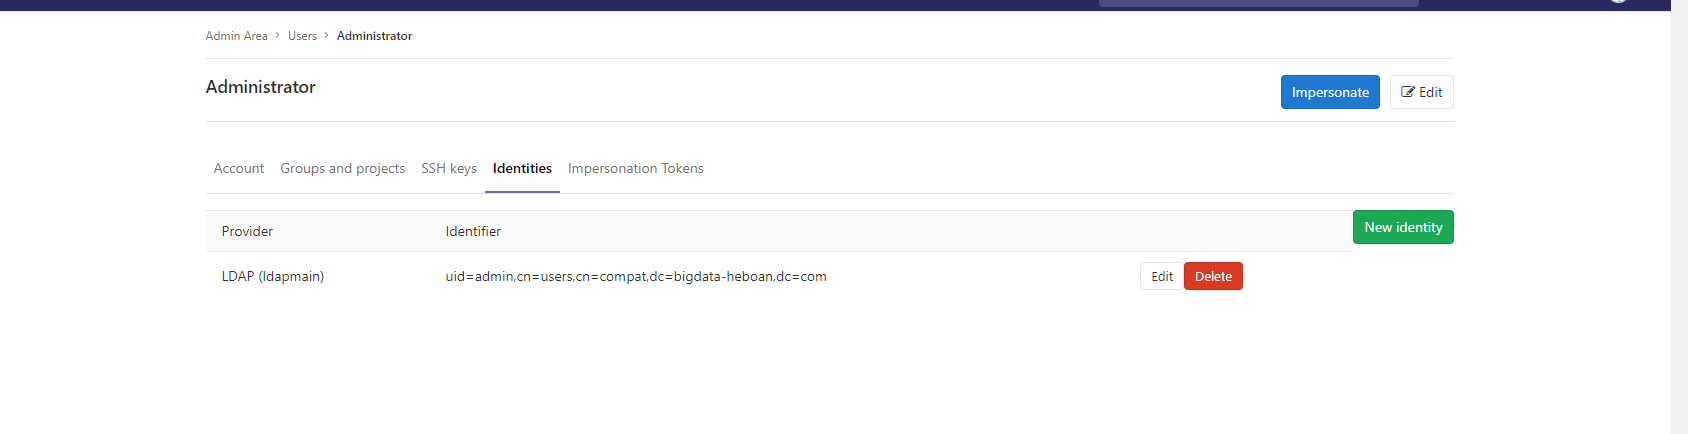
1.host,是搭建的ldap的ip,根据实际情况修改 2.uid,可以配置cn,也可以配置uid,都能识别(具体为什么没深入研究) 3.bind_dn,ldap的管理员账号,根据实际情况修改通过ipa user-find --all命令可以查看到 4.password,ldap的管理员,根据实际情况修改 5.active_directory,似乎是针对连接是否是ad域控的标示,因为这部分是ldap的配置,故为false 6.allow_username_or_email_login,用户登录是否用户名和邮箱都可以,方便用户故配置true 7.base,用户列表所在的目录,因为新增的用户都在ldap的People下,故这么配置,根据实际情况修改 Cn:common name 通用名 对象的属性为CN,例如一个用户的名字为:张三,那么“张三”就是一个CN。 ou : OrganizationUnit 组织单位 o和ou都是ldap目录结构的一个属性,建立目录的时候可选新建o,ou 等。在配置我司交换设备ldap的时候具体是配置ou,o还是cn等,要具体看ldap服务器的相应目录是什么属性。 o:organizationName 组织名 uid: userid 对象的属性为uid,例如我司一个员工的名字为:zsq,他的UID为:z02691,ldap查询的时候可以根据cn,也可以根据uid。配置ldap查询的时候需要考虑用何种查询方式。我司两种方式都支持,具体我司设备配置根据何种方式查询需要有ldap服务器的相关配置来决定。 DC:Domain Component DC类似于dns中的每个元素,例如h3c.com,“.”符号分开的两个单词可以看成两个DC, DN:Distinguished Name 类似于DNS,DN与DNS的区别是:组成DN的每个值都有一个属性类型,例如: H3c.com是一个dns,那么用dn表示为:dc=h3c,dc=com 级别越高越靠后。H3c和com的属性都是DC。 DN可以表示为ldap的某个目录,也可以表示成目录中的某个对象,这个对象可以是用户等。 |
|
1 2 |
#官方参数解释 https://docs.gitlab.com/ee/administration/auth/ldap/index.html |
gitlab ldap登录常见错误:
|
1 |
Could not authenticate you from Ldapmain because "Undefined method `provider' for nil:nilclass". |
如果在 GitLab 中设置了自定义密码长度限制,那么首次尝试登录 GitLab 的新 AD LDAP 用户将在登录页面看到错误:
错误原因
|
1 2 |
尝试登录所有新AD LDAP 用户(密码都比所需的长和短)时将显示该错误: Could not authenticate you from Ldapmain because "Undefined method `provider' for nil:nilclass". |
解决办法:
1.更改或者,创建新的 LDAP 用户,密码长度满足定义的要求,并尝试登录 GitLab
2. 更改gitlab密码长度配置
使用 GitLab UI 更改最小密码长度:
- 在顶部栏上,选择菜单 > 管理。
- 在左侧边栏上,选择设置 > 常规并展开注册限制。

|
1 2 |
3.输入大于或等于的最小密码长度值8。 4.选择保存更改 |
- 本文固定链接: https://www.yoyoask.com/?p=7001
- 转载请注明: shooter 于 SHOOTER 发表
这个作者貌似有点懒,什么都没有留下。