#注:sftp基础配置篇请看 基础篇 Sftp服务配置 这篇是接着上一篇来的 请注意!
1.修改用户shell权限
|
1 2 3 4 |
#修改shooter用户shell权限 因为我们刚才禁止了用户登录 想要生成私钥必须切换到这个用户所以必须把禁止登录打开。 usermod -s /bin/bash shooter cat /etc/passwd #查看shooter用户shell权限 |

2.切换用户到shooter
|
1 2 3 4 5 6 7 8 9 10 11 12 13 14 15 16 17 18 19 20 21 22 23 24 25 26 27 28 |
[生成私钥命令] ssh-keygen -t rsa 然后一直回车到底 [终端] [shooter@localhost ~]$ ssh-keygen -t rsa Generating public/private rsa key pair. Enter file in which to save the key (/home/shooter/.ssh/id_rsa): Enter passphrase (empty for no passphrase): Enter same passphrase again: Your identification has been saved in /home/shooter/.ssh/id_rsa. Your public key has been saved in /home/shooter/.ssh/id_rsa.pub. The key fingerprint is: SHA256:eZzgrnCL2LZ65rr6jxh7omsFCgSqdk0IXyCkOjJGXlI shooter@localhost.localdomain The key's randomart image is: +---[RSA 2048]----+ |++ E.. | |o.= o | |+o + . . | |*.o o . + . | |O+.. . S + | |=o.. . . | |. . . . . | |.=.+++ o | |O*BX*.o | +----[SHA256]-----+ [shooter@localhost ~]$ |
3.设置私钥
|
1 2 3 4 5 6 7 8 9 10 |
#设置公钥authorized_keys的权限为600 外部文件夹.ssh文件夹的权限为700 下载私钥到本地 [shooter@localhost .ssh]$ cat id_rsa.pub >> authorized_keys [shooter@localhost .ssh]$ chmod 600 authorized_keys [shooter@localhost .ssh]$ ll total 12 -rw-------. 1 shooter sftpgroup 411 Nov 19 08:12 authorized_keys -rw-------. 1 shooter sftpgroup 1675 Nov 19 08:11 id_rsa -rw-r--r--. 1 shooter sftpgroup 411 Nov 19 08:11 id_rsa.pub [shooter@localhost ~]$ chmod 700 .ssh |
|
1 |
上面目录权限注意以下,根目录权限不能为777 否则无法登陆,根 /home 或者 /data 最外层目录权限如果设置为777 你就无法登陆。小心 |
4.关闭shooter用户shell权限
|
1 2 |
#关闭shooter用户shell权限 usermod -s /sbin/nologin shooter |
5.使用私钥登录
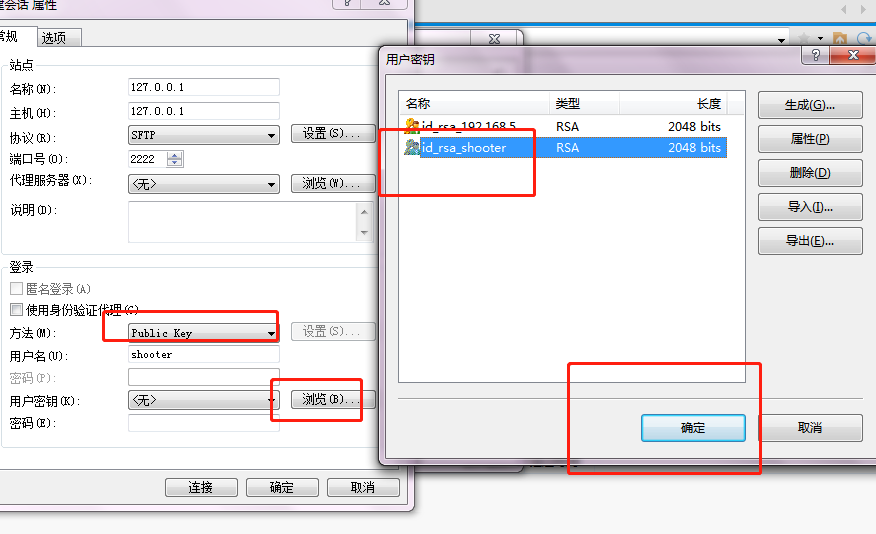
私钥登录成功
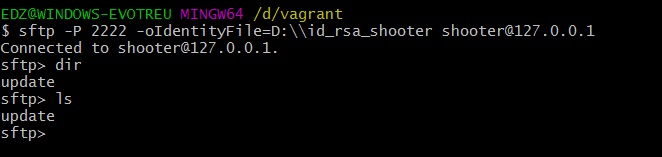
[终端私钥登录]
|
1 2 |
sftp -oIdentityFile=[私钥路径] [用户名]@[ip] -oPort=[端口] sftp -oIdentityFile=/root/.ssh/id_rsa_shooter shooter@127.0.0.1 |
- 本文固定链接: https://www.yoyoask.com/?p=290
- 转载请注明: shooter 于 SHOOTER 发表
这个作者貌似有点懒,什么都没有留下。