Seata 是阿里巴巴开源的分布式事务中间件,一种分布式事务解决方案,具有高性能和易于使用的微服务架构
首先要安装好nacos(单机或者集群都行)
1 安装(下载seata-server-1.4.0.zip两个安装包 )
|
1 |
下载安装包地址:https://github.com/seata/seata/releases |
2 解压
|
1 |
tar -zxvf seata-server-1.4.1.tar.gz |
新版Seata的启动命令参数说明
3 初始化新建一个seata数据,执行db_store.sql文件创建表,内容直接黏贴在下面
|
1 |
create database seata charset=utf8; |
|
1 2 3 4 5 6 7 8 9 10 11 12 13 14 15 16 17 18 19 20 21 22 23 24 25 26 27 28 29 30 31 32 33 34 35 36 37 38 39 40 41 42 43 44 45 46 47 48 49 50 51 |
drop table if exists `global_table`; create table `global_table` ( `xid` varchar(128) not null, `transaction_id` bigint, `status` tinyint not null, `application_id` varchar(32), `transaction_service_group` varchar(32), `transaction_name` varchar(128), `timeout` int, `begin_time` bigint, `application_data` varchar(2000), `gmt_create` datetime, `gmt_modified` datetime, primary key (`xid`), key `idx_gmt_modified_status` (`gmt_modified`, `status`), key `idx_transaction_id` (`transaction_id`) ); -- the table to store BranchSession data drop table if exists `branch_table`; create table `branch_table` ( `branch_id` bigint not null, `xid` varchar(128) not null, `transaction_id` bigint , `resource_group_id` varchar(32), `resource_id` varchar(256) , `lock_key` varchar(128) , `branch_type` varchar(8) , `status` tinyint, `client_id` varchar(64), `application_data` varchar(2000), `gmt_create` datetime, `gmt_modified` datetime, primary key (`branch_id`), key `idx_xid` (`xid`) ); -- the table to store lock data drop table if exists `lock_table`; create table `lock_table` ( `row_key` varchar(128) not null, `xid` varchar(96), `transaction_id` long , `branch_id` long, `resource_id` varchar(256) , `table_name` varchar(32) , `pk` varchar(36) , `gmt_create` datetime , `gmt_modified` datetime, primary key(`row_key`) ); |
业务表undo_log也附在下面
|
1 2 3 4 5 6 7 8 9 10 11 12 13 14 15 16 17 18 19 |
-- the table to store seata xid data -- 0.7.0+ add context -- you must to init this sql for you business databese. the seata server not need it. -- 此脚本必须初始化在你当前的业务数据库中,用于AT 模式XID记录。与server端无关(注:业务数据库) -- 注意此处0.3.0+ 增加唯一索引 ux_undo_log drop table `undo_log`; CREATE TABLE `undo_log` ( `id` bigint(20) NOT NULL AUTO_INCREMENT, `branch_id` bigint(20) NOT NULL, `xid` varchar(100) NOT NULL, `context` varchar(128) NOT NULL, `rollback_info` longblob NOT NULL, `log_status` int(11) NOT NULL, `log_created` datetime NOT NULL, `log_modified` datetime NOT NULL, `ext` varchar(100) DEFAULT NULL, PRIMARY KEY (`id`), UNIQUE KEY `ux_undo_log` (`xid`,`branch_id`) ) ENGINE=InnoDB AUTO_INCREMENT=1 DEFAULT CHARSET=utf8; |
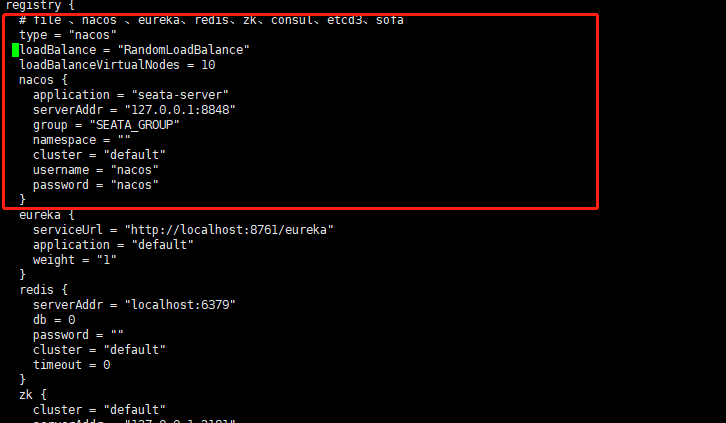
4 修改conf下registry.config文件
我使用的是将type 改为 nacos ,并配置nacos地址
|
1 2 3 4 5 6 7 8 9 10 11 12 13 14 15 16 17 18 19 20 21 22 23 24 25 26 27 28 |
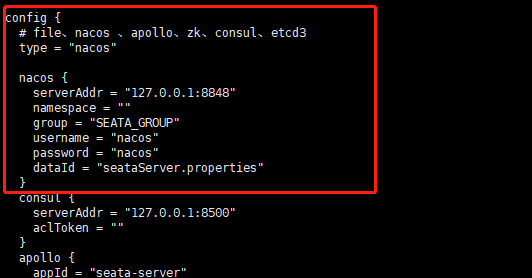
registry { # file 、nacos 、eureka、redis、zk、consul、etcd3、sofa type = "nacos" nacos { application = "seata-server" serverAddr = "192.168.0.66:8848" group = "SEATA_GROUP" namespace = "" cluster = "default" username = "nacos" password = "nacos" } config { # file、nacos 、apollo、zk、consul、etcd3 type = "nacos" nacos { serverAddr = "192.168.0.66:8848" namespace = "" group = "SEATA_GROUP" username = "nacos" password = "nacos" dataId = "seataServer.properties" } |
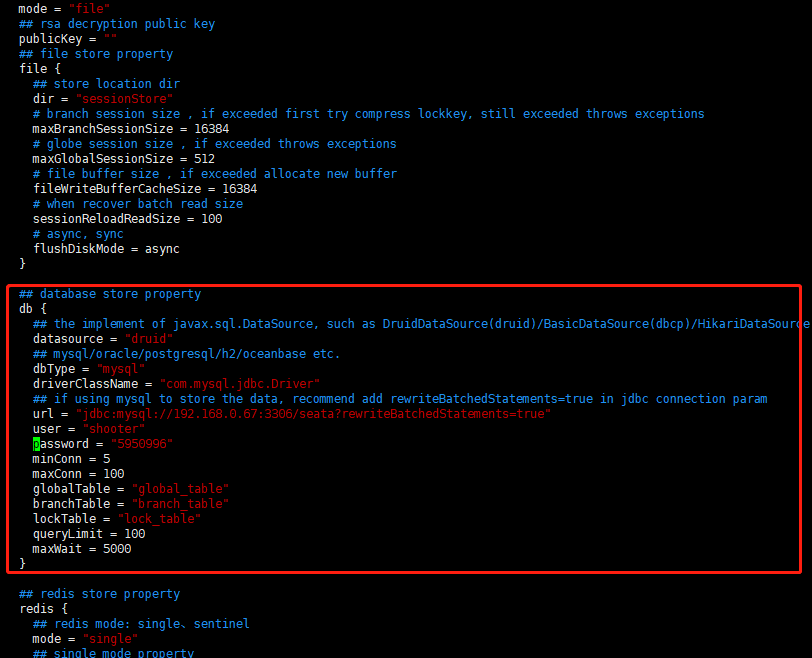
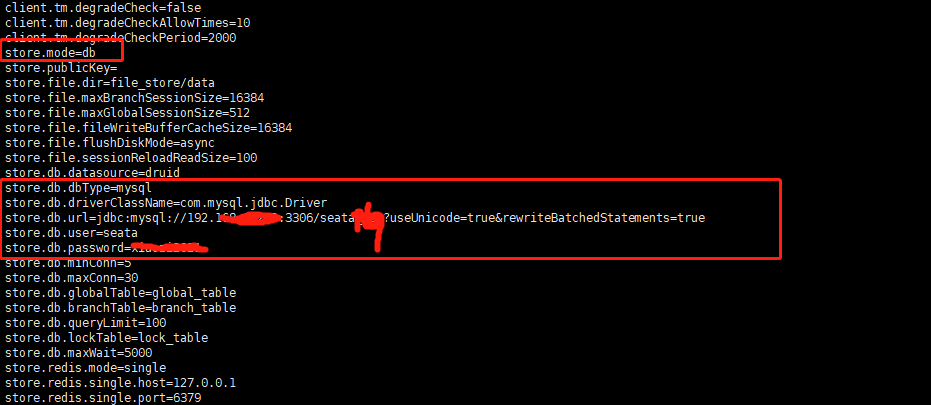
5. file.conf修改( 修改数据库地址,注意mysql5/mysql8驱动不同 )
|
1 2 3 4 5 6 7 8 9 10 11 12 13 14 15 16 17 18 19 20 21 22 |
store { ## store mode: file、db、redis mode = "db" ## database store property db { ## the implement of javax.sql.DataSource, such as DruidDataSource(druid)/BasicDataSource(dbcp)/HikariDataSource(hikari) etc. datasource = "druid" ## mysql/oracle/postgresql/h2/oceanbase etc. dbType = "mysql" driverClassName = "com.mysql.cj.jdbc.Driver" url = "jdbc:mysql://127.0.0.1:3306/seata?serverTimezone=Asia/Shanghai&useUnicode=true&characterEncoding=utf8&useSSL=true" user = "root" password = "123456" minConn = 5 maxConn = 100 globalTable = "global_table" branchTable = "branch_table" lockTable = "lock_table" queryLimit = 100 maxWait = 5000 } } |
6. 启动 SEATA SERVER
|
1 2 3 4 5 6 7 8 9 |
>cd seata/bin >nohup sh seata-server.sh -p 8091 -h 192.168.0.66 >seata.out 2>&1 & -h: 注册到注册中心nacos的ip -p: sease Server rpc监听端口 -m: 全局事务会话信息存储模式,file、db,优先读取启动参数 -n: Server node,多个Server时,需区分各自节点,用于生成不同区间的transactionId,以免冲突 -e: 多环境配置参考 http://seata.io/en-us/docs/ops/multi-configuration-isolation.html |
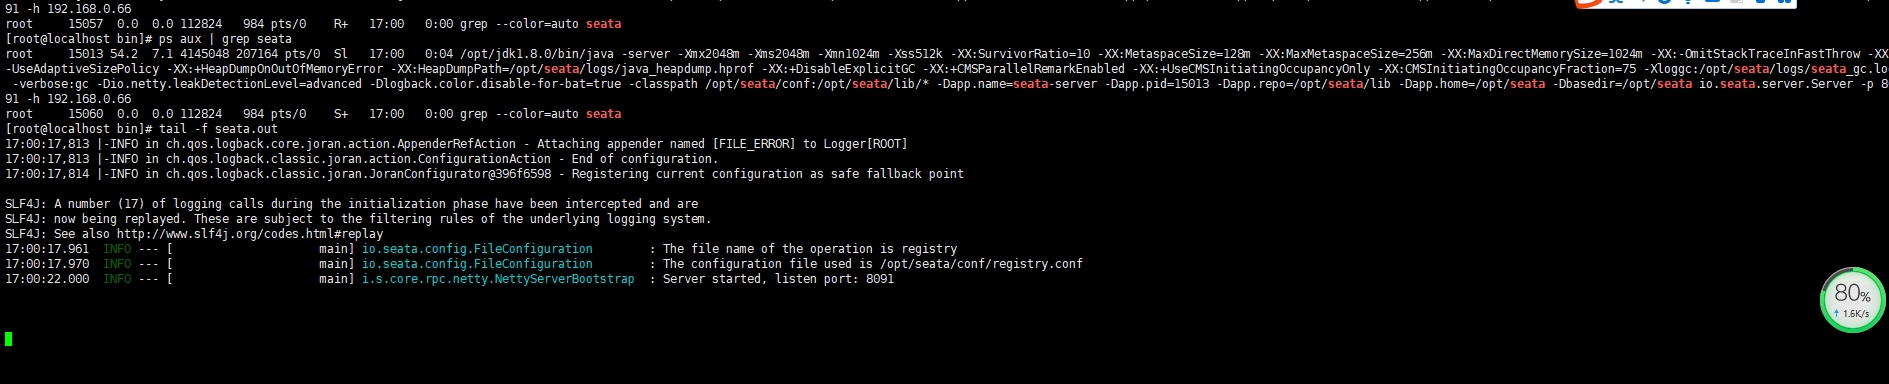
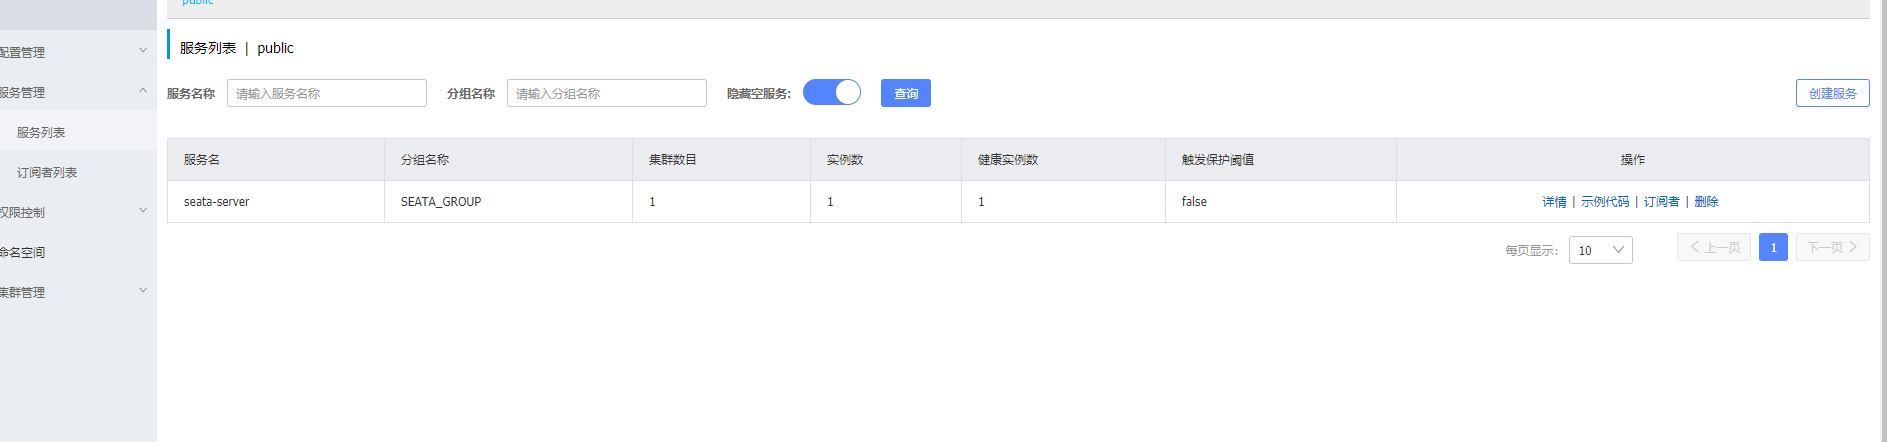
查看服务是否注册成功
设置systemd服务,并设置开机启动
新建启动shell脚本
|
1 |
vim /opt/seata/bin/startup.sh |
|
1 2 |
#!/bin/bash sh /opt/seata/bin/seata-server.sh -p 8091 -h 192.168.0.66 -m db |
授权:
|
1 |
chmod 777 /opt/seata/bin/startup.sh |
新建systemd 服务
|
1 2 |
useradd -s /sbin/nologin -M seata chown -R seata:seata /opt/seata/ |
|
1 |
vim /usr/lib/systemd/system/seata.service |
|
1 2 3 4 5 6 7 8 9 10 11 12 13 |
[Unit] Description=seata Documentation=https://seata.com/ After=network.target [Service] User=seata Group=seata Type=simple ExecStart=/opt/seata/bin/startup.sh Restart=on-failure PrivateTmp=true [Install] WantedBy=multi-user.target |
并授权
|
1 |
chmod 777 /usr/lib/systemd/system/seata.service |
|
1 2 3 4 5 6 |
启动: systemctl enable seata systemctl daemon-reload systemctl start seata systemctl stop seata systemctl restart seata |
如果你得java 没有安装在usr文件夹下需要添加连接,否则无法启动
|
1 |
ln -s /opt/jdk1.8.0/bin/java /usr/bin/java |
初始化服务配置:
7. config.txt 和nacos-config.sh下载地址
|
1 2 |
https://github.com/seata/seata/tree/develop/script/config-center https://github.com/seata/seata/tree/develop/script/config-center/nacos |
|
1 2 3 4 5 6 7 |
1.修改store.mode 存储模式 为 db,默认file; 2.修改数据库链接信息: 主要修改如下几个字段: store.db.url、store.db.user、store.db.password; 其他默认即可。 |
|
1 |
注意:服务名不要超过12位,因为数据库的transaction_service_group 字段默认为32位。 |
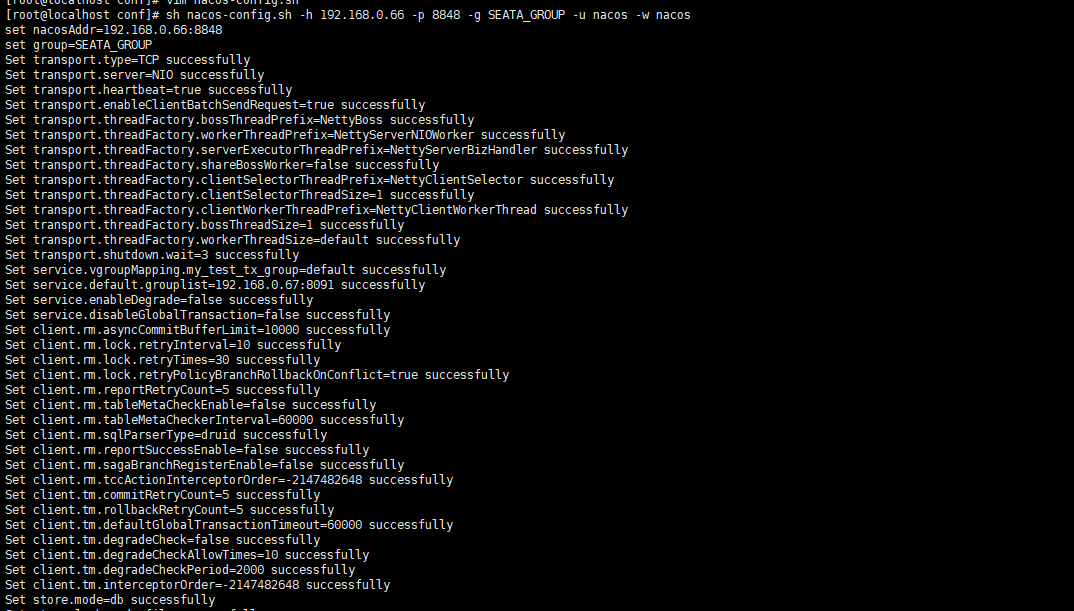
8 将 SEATA 配置添加到 NACOS 中
|
1 2 3 4 5 6 7 |
cd seata/conf/ echo " USAGE OPTION: $0 [-h host] [-p port] [-g group] [-t tenant] [-u username] [-w password] " -t [暂时未知参数含义] sh nacos-config.sh -h 192.168.0.66 -p 8848 -g SEATA_GROUP -u nacos -w nacos |
|
1 |
将config.txt文件挪至上层目录 |
成功后会提示
|
1 |
init nacos config finished, please start seata-server |
|
1 |
在 Nacos 管理页面应该可以看到有 47 个 Group 为SEATA_GROUP的配置 |
|
1 |
- 本文固定链接: https://www.yoyoask.com/?p=5743
- 转载请注明: shooter 于 SHOOTER 发表
这个作者貌似有点懒,什么都没有留下。